A beautiful mehndi design does not always need heavy details or complicated patterns. Sometimes, a clean and simple design can make the hands look even more elegant. A simple front-hand mehndi design is a perfect choice for women and girls who want a graceful look without spending hours applying intricate henna.
Simple front-hand mehndi designs are suitable for many occasions, including Eid, weddings, family gatherings, festivals, parties, and casual celebrations. They are also a great option for beginners because most patterns use easy elements such as flowers, leaves, dots, lines, curves, paisleys, and small geometric shapes.
At Mehndi Crafted, we love designs that combine traditional henna beauty with modern simplicity. Whether you prefer a floral pattern, a leafy vine, a small mandala, or delicate finger detailing, there are plenty of ways to create an attractive front-hand look.
In this article, you will find simple and stylish ideas that can inspire your next mehndi application. The designs are easy to customize, so you can make them lighter or more detailed according to your preference.
Why Choose Front Hand Simple Mehndi Design?
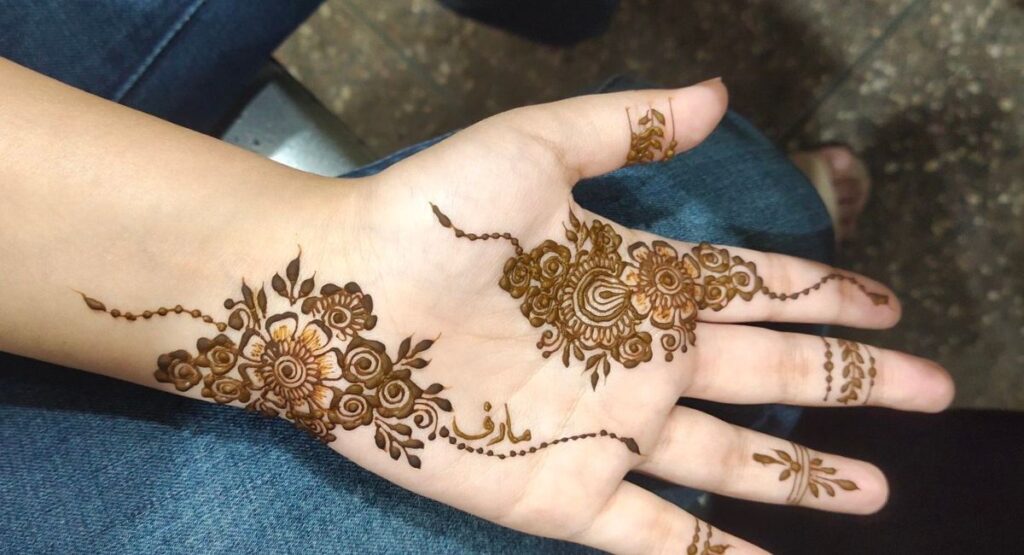
There are many reasons why simple front-hand designs continue to be popular. First, they are easy to apply and can be adapted according to the shape and size of your hand.
For beginners, simple patterns provide an opportunity to practice basic mehndi strokes without feeling overwhelmed. Flowers, leaves, dots, circles, and curved lines are some of the easiest elements to learn.
Another advantage is that simple designs work for almost every age group. Girls can choose cute and minimal patterns, while women can select elegant floral, Arabic-inspired, or geometric designs.
A simple design can also be suitable for both casual and special occasions. You can wear a light pattern for a family gathering or add more details for Eid or a wedding function.
Easy Front Hand Mehndi Design Ideas
Here are some easy front hand mehndi design ideas you can try. Each style can be adjusted according to your skill level and personal preference.
1. Minimalist Floral Pattern
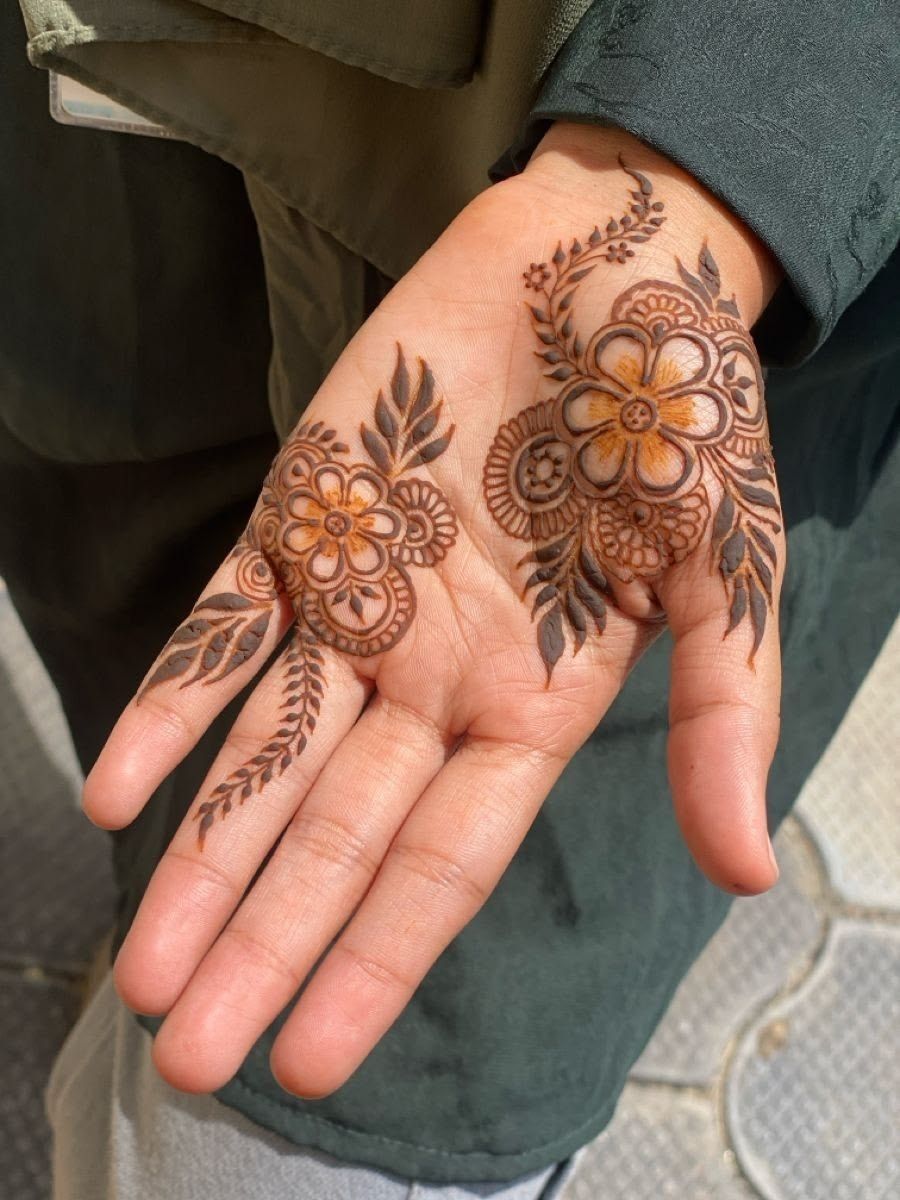
minimalist floral front hand mehndi design
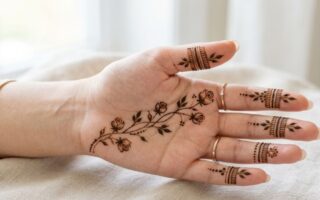
A minimalist floral pattern is one of the easiest and most beautiful choices for a simple front-hand mehndi design. Flowers have always been a popular element in mehndi because they give the hands a soft, feminine, and graceful appearance.
Draw small flowers along the fingers. You can use simple five-petal flowers or slightly more detailed floral motifs depending on your experience.
Add tiny leaves around the flowers to connect the different motifs. Small curved stems can make the pattern flow naturally across the hand.
Leave some skin space for a clean and modern look. Negative space is particularly important in minimalist mehndi because it prevents the design from looking crowded.
You can also add tiny dots around the flowers for a delicate finishing touch. If you want a slightly more festive appearance, extend one floral vine from the palm toward the wrist.
This design is especially suitable for beginners because it does not require complicated shading or dense detailing. It can also be completed relatively quickly, making it a practical choice for Eid, parties, and casual occasions.
2. Geometric Lines and Dots
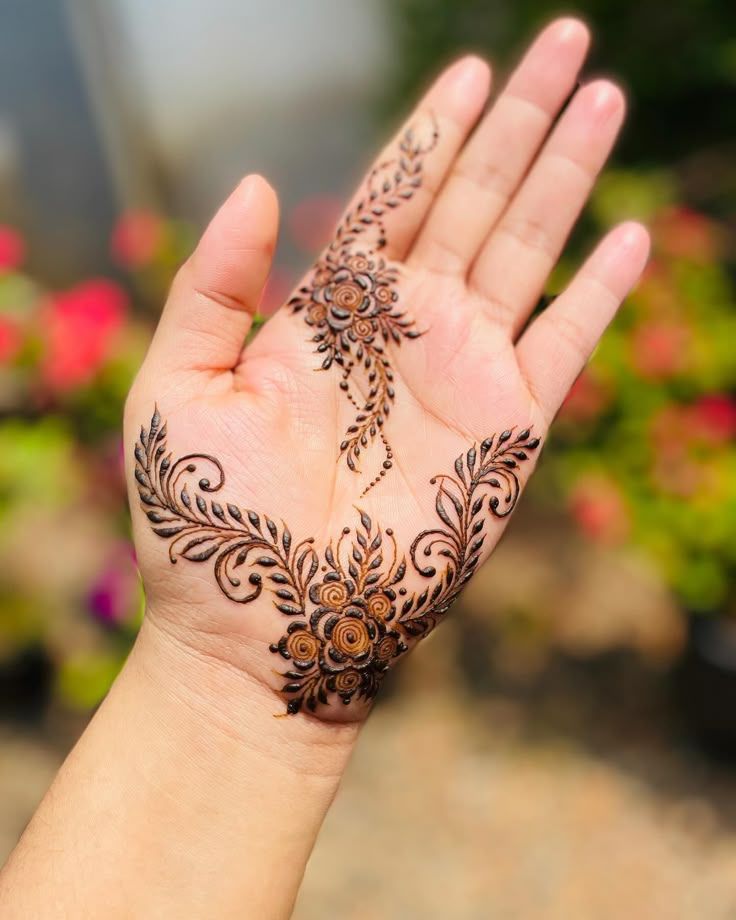
geometric simple mehndi design front hand
Simple, straight, or diagonal lines on the hand can create a modern and sophisticated appearance. Geometric patterns are ideal for people who prefer clean designs instead of traditional floral-heavy mehndi.
Add small dots to enhance the pattern. Dots can be placed between lines, around geometric shapes, or near the fingers to give the design more detail without making it too complicated.
Works well for a classy, minimalist look. You can create small triangles, circles, squares, grids, or diamond shapes and connect them with thin lines.
One of the most attractive things about geometric mehndi is its versatility. You can keep the design very simple or gradually add more patterns. For example, a small geometric centerpiece on the palm can be connected to simple finger bands.
If you are a beginner, practice drawing straight and curved lines on paper before applying them to your hand. Consistent pressure on the cone will help you create cleaner lines.
Geometric designs also look particularly attractive when combined with small floral motifs. This combination creates a balance between traditional mehndi and modern design..
3. Finger-Focused Design
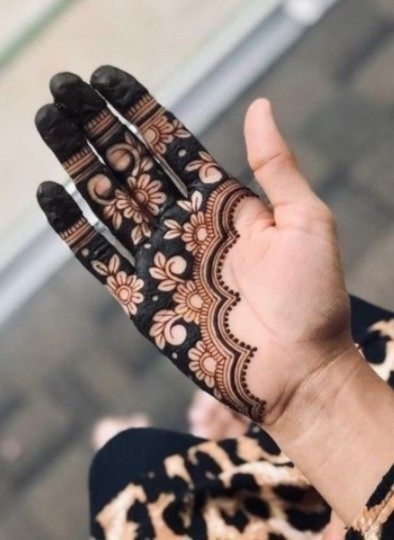
finger mehndi design simple front hand
Apply henna only on the fingers if you prefer an extremely simple and elegant style. Finger-focused designs are a great choice when you want decorated hands without covering a large portion of the palm.
Create rings, stripes, or small flowers. You can decorate all five fingers with similar patterns or use slightly different details on each finger.
Easy and perfect for casual occasions. This style is also convenient for people who have limited time because the design area is smaller than a full palm pattern.
You can create a simple ring-like band around one section of each finger and add small dots underneath it. Another option is to draw tiny leaves or floral motifs along one side of the finger.
Finger-focused mehndi can also be combined with a small central motif on the palm. This gives the hands a complete appearance while keeping the overall design light.
For beginners, this is one of the best ways to practice cone control. Start with simple lines and dots, then gradually experiment with flowers, leaves, and tiny paisleys.
4. Leafy Vine Design
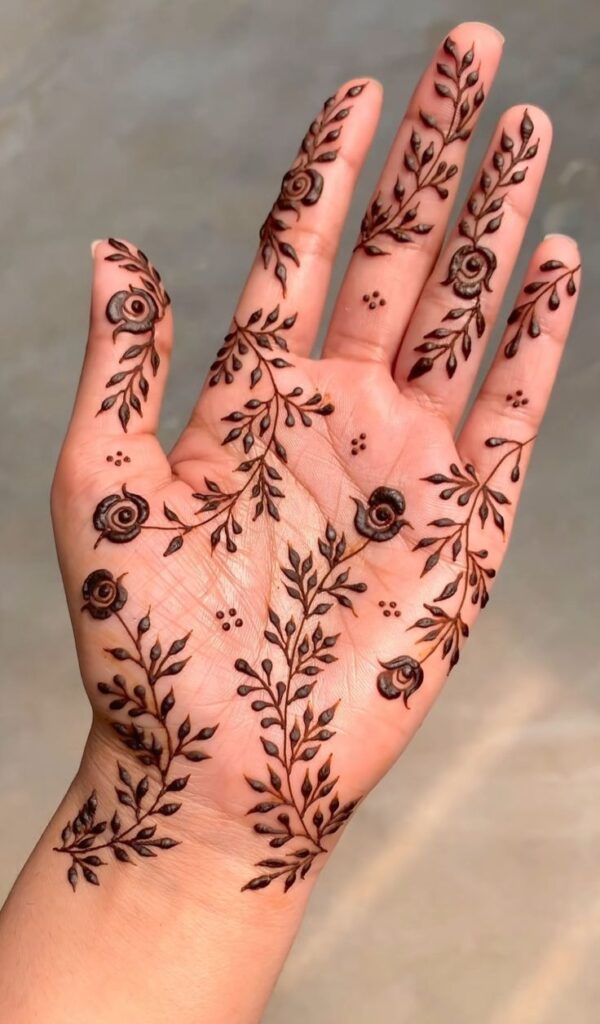
leaf vine mehndi design front hand simple
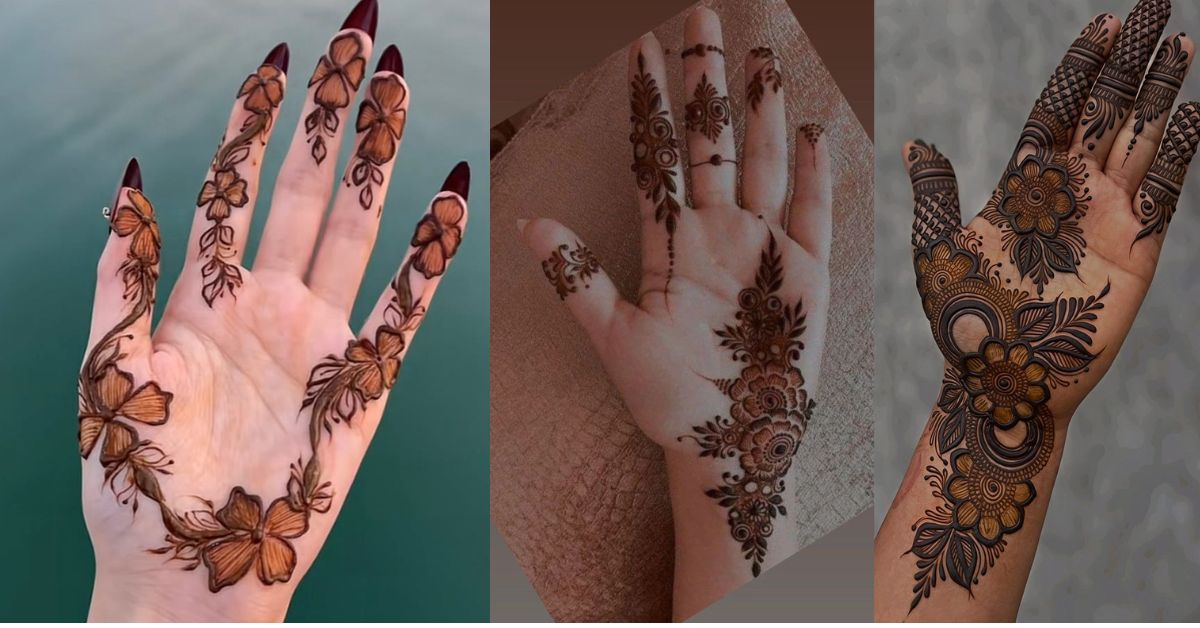
Draw a thin vine starting from the wrist to the middle of the hand. A curved vine creates a natural flow and can make the hand look longer and more graceful.
Add small leaves along the vine. You can place the leaves on alternating sides of the stem or create a slightly fuller vine by adding several leaves close together.
Elegant and simple for any event. This style works particularly well for women who prefer natural-looking mehndi patterns.
You can also add a few tiny flowers between the leaves. If you want an even simpler appearance, use only leaves and small dots without flowers.
The direction of the vine can also be changed according to your preference. It can move diagonally across the palm, curve toward the thumb, or extend gently toward one of the fingers.
A leafy vine is especially attractive when combined with negative space. Instead of filling the palm, allow the vine to remain the main focus.
5. Mandala Accent
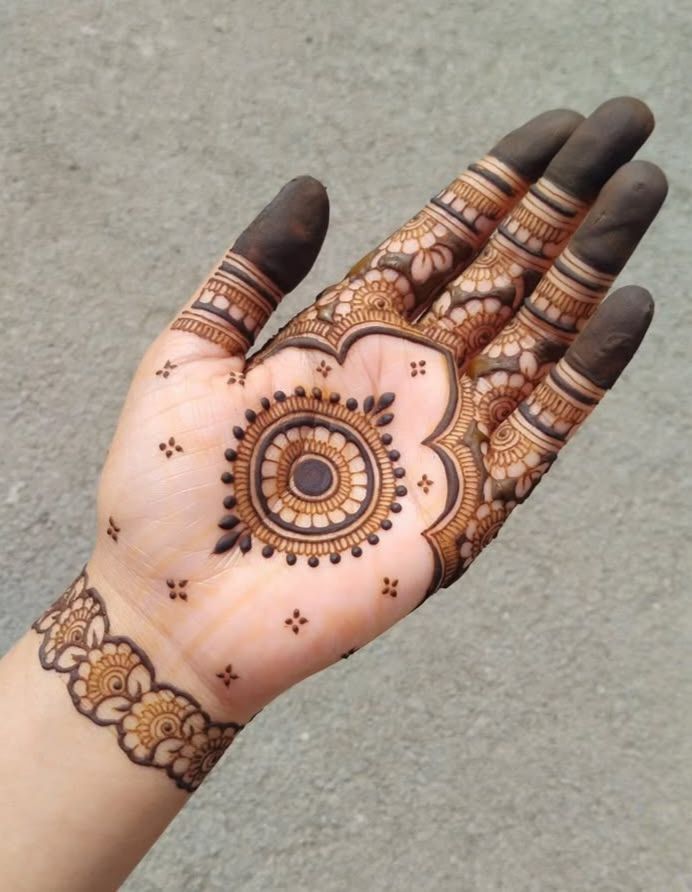
small mandala mehndi design front hand
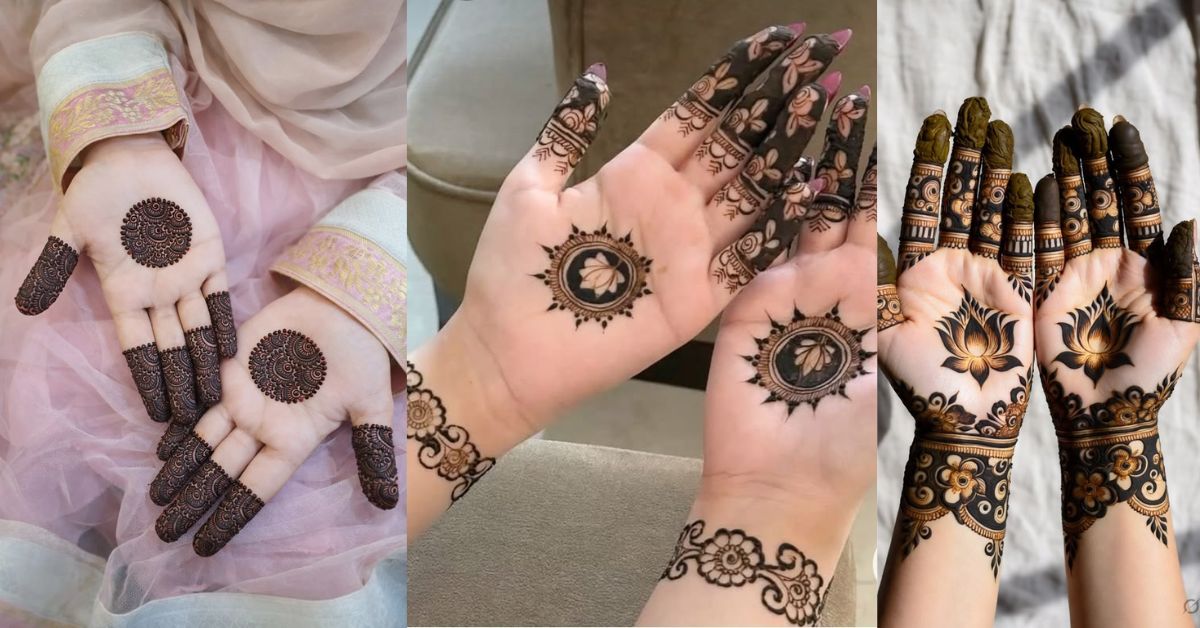
A small mandala in the center of the palm can create a beautiful focal point. A mandala does not have to be large or heavily detailed to make an impact.
Surround it with tiny dots or leaf patterns. You can create two or three simple circular layers around the center and finish the design with small petals or dots.
A stylish design that does not cover the entire hand. Leaving the surrounding palm open gives the mandala a clean and modern appearance.
A small mandala is also easy to customize. Beginners can use simple circles and petals, while experienced mehndi artists can add multiple borders, shading, dots, and fine details.
You can connect the mandala to the fingers with a few curved lines or keep it completely independent in the center of the palm. Both approaches can create an elegant front-hand simple mehndi design.
Benefits of Front Hand Simple Mehndi Design
Time-Saving: Simple designs can often be applied much faster than complicated bridal patterns. Depending on the size and details, many light designs can be completed in less than 30 minutes.
Skin-Friendly: A simple pattern uses less paste than a very dense design and generally involves fewer complicated layers. However, always use good-quality natural henna and avoid products containing unsafe chemical dyes.
Easy Maintenance: Minimal patterns are easier to preserve because fewer delicate details can accidentally rub away. They are also easier to touch up if a small section fades.
Versatile Style: A simple design can complement casual clothing, traditional dresses, festive outfits, and wedding guest looks. You can adjust the amount of detailing according to the occasion.
Encourages Creativity: Simple mehndi gives you the freedom to experiment with small motifs and patterns. You can combine flowers, leaves, dots, paisleys, vines, and geometric elements to create a personalized design.
Another benefit is that simple mehndi photographs beautifully. Clear patterns with open spaces can look neat in hand photographs, especially when paired with rings, bangles, or traditional outfits.
Step-by-Step Guide to Create a Simple Front Hand Mehndi Design
Here’s a simple step-by-step method to create your design. Following a basic process can make the application easier, especially if you are new to mehndi.
Step 1: Prepare Your Hand
Wash your hands and dry them thoroughly. Clean skin helps remove dirt, oil, and other products that may interfere with the application.
Avoid applying heavy lotion, cream, or oily products immediately before applying mehndi. Clean and dry skin generally provides a better surface for the henna paste.
If your skin is extremely dry, take care of it beforehand, but allow any moisturizer to absorb completely before applying mehndi.
Step 2: Prepare the Mehndi Cone
Cut the tip of your mehndi cone carefully. The opening should be small enough to produce a controlled line.
Test on paper to check the flow. This is an important step because the paste should come out smoothly without being too thick or too thin.
If the cone produces uneven lines, check the opening and gently adjust it. Practicing a few lines and dots on paper can also help you get comfortable before starting on your hand.
Step 3: Start with the Main Motif
Begin at the center of the palm or wrist. Starting with the main element gives you a clear foundation for the rest of the design.
Draw a flower, circle, or mandala shape. Keep the first motif relatively simple if you are a beginner.
Once the main motif is complete, look at the available space around it. This will help you decide where to add leaves, vines, dots, or finger details.
Step 4: Add Details
⦁ Add small leaves, lines, or dots around the main motif.
⦁ Keep the design light for a simple look.
⦁ Use curved lines to connect separate motifs naturally.
⦁ Avoid filling every empty area simply because there is space available.
The goal of a simple design is balance. A few carefully placed details can often look better than many crowded elements.
Step 5: Decorate Fingers
⦁ Draw rings, lines, or tiny flowers on each finger.
⦁ You can decorate all the fingers or focus on only two or three.
⦁ Keep finger patterns consistent with the main palm motif.
⦁ Leave some areas uncovered to maintain the minimalist appearance.
Finger details can make a simple palm design look more complete without requiring a large amount of additional work.
Step 6: Let It Dry
⦁ Leave the mehndi to dry naturally for several hours.
⦁ Once completely dry, gently scrape the paste away instead of washing it off immediately.
⦁ Avoid unnecessary contact with water immediately after removing the paste.
⦁ The stain will usually develop gradually and may become darker over the next day or two.
The final color can vary depending on the quality of the henna, skin type, body temperature, application time, and aftercare. Natural henna generally develops from an orange tone into a deeper reddish-brown stain.
Common Mistakes to Avoid
Too Much Detail: Overcomplicating can ruin the simplicity of the design. If your goal is a minimal look, do not fill every empty area with patterns. Open space is an important part of the design.
Uneven Pressure: Pressing too hard may create thick lines. Try to maintain gentle and consistent pressure while moving the cone across the skin.
Not Testing the Cone: Check the flow before starting. A blocked or poorly cut cone can make the design difficult to control.
Rushing: Take your time for precise patterns. Even a simple design looks much better when the lines are clean, and the motifs are properly spaced.
Immediate Washing: Avoid washing the design immediately after removing the dried paste. Excessive water exposure too soon can interfere with the development of the stain.
Another common mistake is applying mehndi over oily or heavily moisturized skin. Clean, dry skin is generally easier to work on and can help produce a more consistent application.
It is also important to use safe henna. Avoid suspicious products marketed as extremely fast or instantly black henna, as some may contain ingredients that can cause serious skin reactions.
FAQs
Q1: Can beginners try a front-hand simple mehndi design?
Yes, it’s ideal for beginners because it’s easy and requires minimal skill.
Q2: How long does it take to apply?
Usually, 15–30 minutes, depending on the complexity of the design.
Q3: How long does the mehndi last?
It lasts 5–10 days, and the stain becomes darker after 24–48 hours.
Q4: Can I use henna for parties and weddings?
Absolutely! Simple designs are elegant and suitable for any occasion.
Q5: Should I moisturize my hands before applying mehndi?
Lightly moisturizing helps, but avoid oily creams as they may prevent the dark color.
Q6: Can I create my own design?
Yes! You can mix floral, geometric, and vine patterns to make unique designs.
Q7: How to make mehndi darker?
Leave it on longer, avoid water for a few hours, and apply the lemon-sugar mixture gently.
Conclusion
A simple front-hand mehndi design is an easy, elegant, and versatile option for almost any occasion. With minimal effort, you can achieve stunning results that enhance the natural beauty of your hands without covering them with complicated patterns.
These designs are beginner-friendly, stylish, and time-saving, making them perfect for daily wear, Eid, parties, family gatherings, festivals, and wedding events. Floral patterns, geometric lines, finger-focused designs, leafy vines, and small mandala accents all provide beautiful ways to decorate the front of your hand.
The best thing about simple mehndi is that you can personalize it according to your own style. You can keep the design extremely minimal or add a few extra flowers, leaves, dots, and finger details when you want a more decorative appearance.
At Mehndi Crafted, we believe that beautiful henna does not always need to be complicated. Sometimes, a few clean lines, delicate motifs, and well-planned empty spaces are enough to create a graceful and memorable look.
Try one of these simple ideas for your next mehndi session and use the designs as inspiration to create a pattern that feels uniquely yours.